


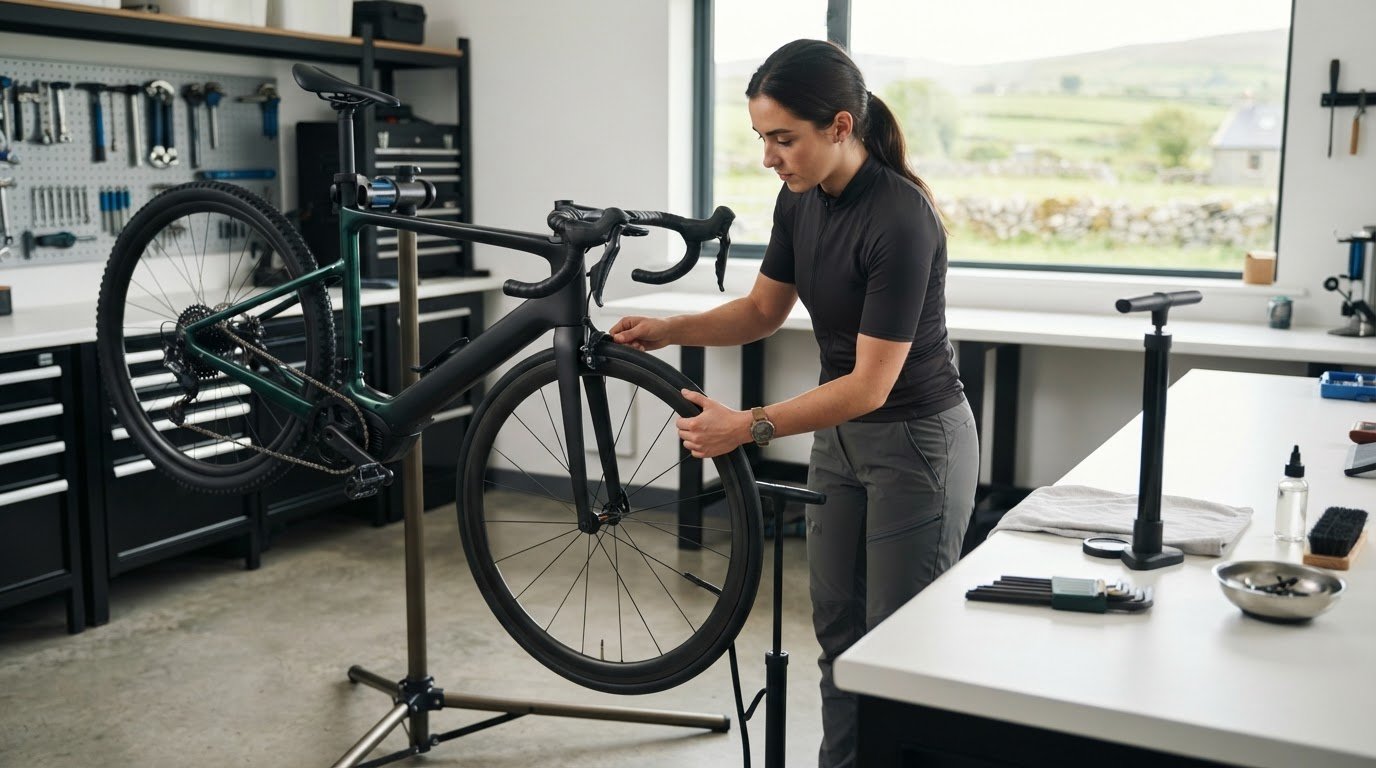
What if the most useful bike-maintenance skill isn’t fixing a puncture, but knowing what to check before you set off? If you’re new to cycling, it’s easy to be unsure whether a soft tyre, a rubbing brake or a noisy chain needs attention straight away. Bicycle maintenance for beginners doesn’t have to mean tackling complicated repairs. A short, repeatable safety check can help you spot common issues and ride with more confidence.
This guide shows you what to check before a ride, how to clean your bike without unsuitable products, and where to apply lubricant. You’ll also learn which warning signs mean it’s sensible to stop and seek professional help instead of attempting an adjustment you’re not comfortable with.
We’ll take it step by step, from tyres, brakes and gears to a simple cleaning routine and regular servicing. For road bikes and e-bikes, The Cycle Centre’s Shimano accredited workshop and specialist technicians are a practical next step when a job is beyond your experience. Start with the basics, then build confidence as you go.
Key Takeaways
- Build a quick pre-ride check to catch visible issues before you set off.
- Use the pressure guidance printed on the tyre sidewall when checking inflation.
- Clean and dry your bike before applying lubricant to the chain, then wipe away any excess.
- Set a maintenance rhythm that suits your riding habits and the conditions, rather than relying on one fixed schedule.
- Knowing when to stop and arrange workshop attention is just as important as learning basic checks.
Bicycle Maintenance for Beginners: Why Start with a Simple Safety Check?
Routine maintenance means checking and caring for your bike so it can work as it should. It doesn’t mean taking components apart or attempting every repair yourself. For beginners, start with a calm visual inspection. A tyre losing air, a brake lever that feels different or a wheel that isn’t secure is easier to notice before you leave home than once you’re on the road.
A pre-ride check is a brief, repeatable inspection of your bike’s tyres, brakes, chain, wheels and visible condition before you set off. It helps you spot changes and decide whether the bike is ready to ride. The Bicycle maintenance overview covers a wider range of care and repairs, but you can begin with a few simple checks that don’t require specialist tools.
What should a beginner check before every ride?
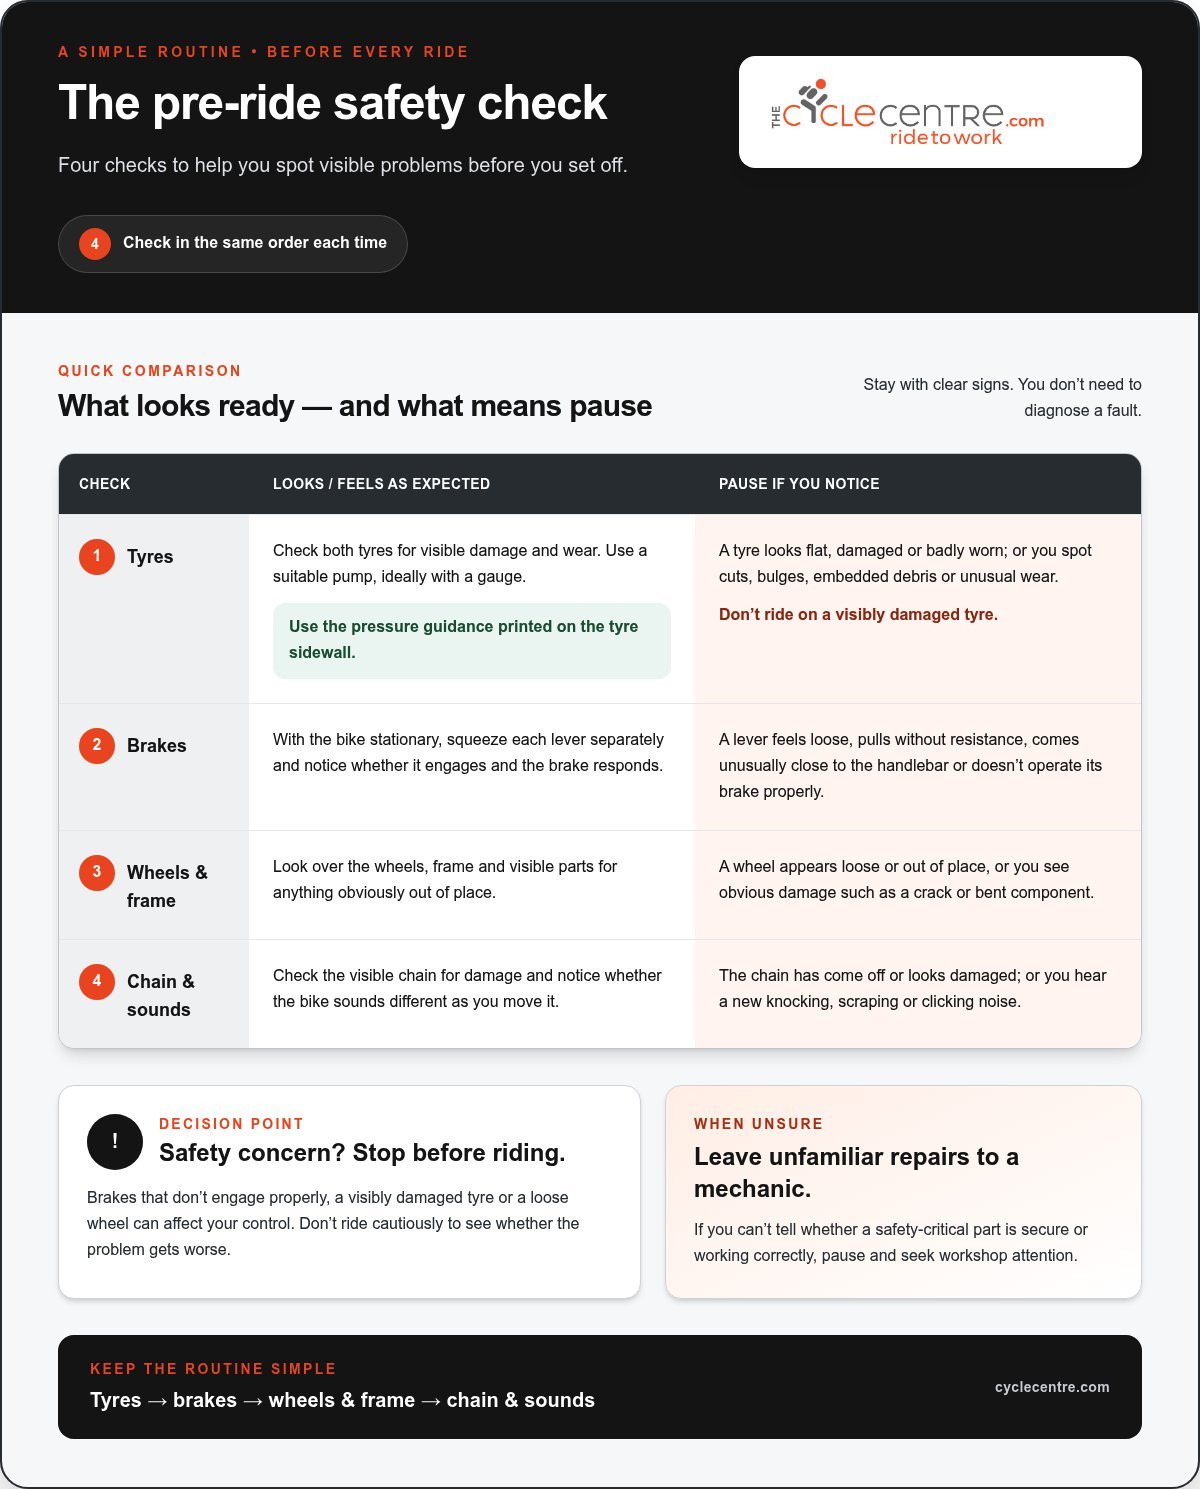
Use the same sequence each time. It’s easier to remember and helps you notice when something looks or feels different. You don’t need to diagnose a fault. Focus on clear warning signs.
- Look over the tyres. Check that neither looks flat, visibly damaged or badly worn. If a tyre appears deflated, don’t assume it will be fine once you start riding.
- Squeeze both brake levers. Each should engage rather than pull without resistance. If a lever feels loose or doesn’t operate its brake properly, pause before riding.
- Check the wheels and frame. Look for a wheel that appears loose or out of place. Scan the frame and visible parts for obvious damage, such as a crack or a bent component.
- Notice the chain and any unusual sounds. Look for a chain that has come off or is visibly damaged. If the bike makes a new knocking, scraping or clicking noise as you move it, investigate rather than ignoring it.
How can you tell when a bike may be unsafe to ride?
Some signs call for a clear decision: stop and don’t ride until the problem has been resolved. Brakes that fail to engage properly, a visibly damaged tyre or a loose wheel can affect your control. Don’t ride cautiously to see whether the problem gets worse.
Other symptoms can be harder to assess, especially if you’re unfamiliar with how a bike should feel. If you can’t tell whether a safety-critical part is secure or working correctly, leave the repair to a mechanic. A workshop is a sensible next step when a job is beyond your confidence. Cycle Centre’s Shiamno accredited workshop has specialist technicians for road bikes and e-bikes. A check is useful precisely because it helps you recognise when not to set off.
How to Check Your Bike’s Tyres, Brakes and Chain
A repeatable order helps you check the parts that affect grip, control and smooth pedalling without reaching for tools or making adjustments. Take a moment with the bike stationary, and treat anything damaged or uncertain as a reason to pause.
How do you check tyre pressure and condition?
Start with the front tyre, then check the rear. Look closely at the tread and sides for cuts, embedded glass or stones, bulges and unusual wear. Remove loose debris only if you can do so safely. Don’t dig into the tyre or ride on one that looks damaged.
Next, check the pressure with a suitable pump, ideally one with a gauge. The recommended pressure range is printed on the tyre sidewall. Follow the guidance for your tyre rather than guessing or copying a pressure from another bike. A tyre that feels firm when squeezed may still be under- or over-inflated, so touch alone isn’t a precise measurement.
How do you check brakes and the chain?
With the bike stationary, squeeze each brake lever separately. Notice whether it engages and whether the brake responds. If a lever pulls unusually close to the handlebar, feels loose or doesn’t operate the brake, don’t try to compensate by riding carefully. The cause may need a mechanic’s attention.
For the chain, look along its visible length. It shouldn’t appear damaged, be hanging off or have links that look bent. A dry or dirty chain may need cleaning and lubrication, covered in the next section. A damaged chain is different and shouldn’t be treated as a routine cleaning job. Keep fingers, clothing and anything you’re holding clear of the chain and gears, especially if the pedals are turning.
Follow the same order each time
Check the tyres, test the brakes, inspect the chain and look over the bike for anything unusual. This simple sequence is a practical starting point for bicycle maintenance for beginners. Repeating it in the same order can make it easier to notice a new change before setting off.
If you spot damage, a brake that doesn’t work as expected or a fault you can’t confidently assess, stop rather than attempting an unfamiliar adjustment. For road bikes and e-bikes, Cycle Centre’s workshop service can help when a check points to a job beyond your experience.
How to Clean and Lubricate a Bicycle Without Damaging It
Road grime can hide wear and work its way into moving parts, so cleaning does more than improve your bike’s appearance. A clean chain and drivetrain can move more smoothly, and removing dirt makes it easier to see the components. The key is to clean gently and use lubricant only where it belongs. You don’t need an elaborate setup to get started.
Remove loose dirt, clean the bike carefully, dry it thoroughly, then apply a small amount of chain lubricant and wipe away the excess. This order helps avoid grinding grit into parts or trapping moisture beneath fresh lubricant. Work in a well-ventilated space and follow the instructions on any cleaning or lubrication product you use.
What is the beginner-friendly way to clean a bike?
Begin by brushing or wiping away loose dirt with a soft brush or cloth. Pay attention to the frame, wheels and drivetrain, but use a separate cloth or brush for the chain and gears if you can. Grit picked up from the drivetrain can scratch the frame’s finish if rubbed across it.
Clean the frame and components carefully with a suitable bicycle cleaner, following its label. Avoid harsh household chemicals or products not intended for bike surfaces and components, as they may damage finishes or affect parts. Don’t force a brush into seals, bearings or other tight gaps. Gentle cleaning is enough for routine care.
Rinse or wipe away cleaner as its instructions direct, then dry the bike with a clean cloth. Take particular care to dry the chain before lubricating it. If it’s still wet, lubricant may not coat it as intended. Cleaning is also a useful opportunity to look for dirt built up around the chain or signs of damage that need a closer inspection.
Where should you apply chain lubricant?
Use lubricant made for bicycle chains, not general-purpose oil. Chain lubricant is intended for the moving links; ordinary oil may not suit the job and can leave residue that collects dirt. Follow the lubricant’s directions, as products can differ in how they should be applied.
Choose a gear that lets the chain run smoothly, then turn the pedals slowly by hand while applying a small amount to the chain. Keep your fingers, sleeves and cloth clear of the moving chain and gears. Once you’ve worked around the chain, stop and wipe off excess lubricant with a clean cloth. A heavy coating isn’t better: surplus can attract grit and leave the drivetrain dirty again.
Keep lubricant off the rims, disc rotors, brake pads and other braking surfaces. Oil contamination can reduce braking performance, so take care not to spray or drip lubricant near the brakes. If lubricant gets onto a braking surface, don’t ride until the issue has been properly addressed. If a cleaning or lubrication job feels unfamiliar, or you’re unsure about a component, leave it to a mechanic.
A Beginner Bicycle Maintenance Routine: Tools and Timing
A manageable routine is easier to keep up than a long list of jobs. Divide care into three moments: a quick check before riding, cleaning when dirt builds up, and prompt attention when something changes. This approach helps you look after your bike without assuming every adjustment belongs in a home toolkit.
Keep a small set of useful basics together, but remember that tools aren’t a reason to attempt every repair. Start with checks and care you understand. If a fitting won’t move easily or you’re unsure how a part works, stop rather than forcing it.
Which basic bike maintenance tools are useful to have?
A suitable pump helps you inflate tyres according to their sidewall guidance. Tyre levers can help remove a tyre when dealing with an inner tube. Keep a clean cloth for drying and wiping, and a bike multitool for simple fittings that match its tools. Use the correct tool and fit it securely before applying gentle pressure. A beginner’s kit doesn’t need advanced workshop equipment.
Tools are only useful when they match the bike. Fittings can vary, so don’t assume one multitool will suit every bolt or force a lever if it doesn’t turn. Avoid taking apart components just to see how they work. If a simple check points to a repair you haven’t learnt to do safely, leave it to a mechanic.
How often should you do basic bike maintenance?
Check your bike before rides, and clean it when mud, grit or grime has built up. How often cleaning is needed depends on how frequently you ride and the conditions you encounter. Wet, dirty roads can leave more residue than a short ride in dry weather, so let the bike’s condition guide you rather than following an arbitrary calendar.
Respond promptly to a new noise, a change in shifting or visible wear. These signs don’t always mean the same repair is needed, but they’re a reason to investigate before the issue worsens. Don’t wait for a planned cleaning day if something appears damaged or a safety-critical part isn’t working properly.
Use this simple rhythm:
- Before a ride: make a brief visual check and notice anything that feels or sounds different.
- After dirty rides: remove built-up grime and dry the bike as needed.
- When a problem appears: pause, identify what you can safely, and avoid forcing an unfamiliar adjustment.
There’s no single service interval that suits every bike and riding pattern. Follow any care guidance supplied with your bike, and consider workshop attention when an issue is beyond routine cleaning or a basic check. For a professional workshop service, explore Cycle Centre’s bike workshop services.
When Beginner Bike Maintenance Should Give Way to a Workshop
Basic checks and cleaning are valuable, but they don’t mean every repair should be done at home. Knowing where to stop is part of good bicycle maintenance for beginners. If a fault affects braking, steering or the bike’s stability, don’t ride while you try to work out the cause. A mechanic can assess the problem and carry out repairs that call for experience or specialist tools.
Which bike problems should a beginner avoid fixing alone?
Stop and arrange professional attention if a brake isn’t working properly, a component looks damaged, or a drivetrain problem persists after simple cleaning. A chain that keeps slipping, gears that won’t shift reliably or a new grinding noise may point to an issue that needs more than a basic adjustment. Don’t keep turning screws or tightening fittings if you’re unsure what they control.
Wheel and bearing work, cable replacement and derailleur adjustments can be difficult to assess without experience. A wheel that wobbles, feels loose or doesn’t sit correctly, or a bearing that feels rough, deserves proper attention. So does a frayed cable or a gear system that remains unreliable. If you can’t tell whether a part is secure or functioning safely, leave the repair to a mechanic. It’s sensible to stop rather than risk making the fault worse.
How can a specialist workshop help with more complex maintenance?
A workshop can inspect the parts involved, identify what may be causing the symptoms and carry out work that’s beyond a beginner’s tools or confidence. This is especially useful when an issue involves several connected components, or when a bike’s behaviour changes despite routine care. You don’t need to diagnose the fault yourself. Describing what you noticed, such as when a noise occurs or how shifting feels, gives the mechanic a useful starting point.
Cycle Centre’s workshop is Shiamno accredited, with specialist technicians for road bikes and e-bikes. Its e-bike motor expertise covers Bosch, Shimano, Yamaha and Bafang. If a fault involves one of these systems, workshop attention is more appropriate than attempting unfamiliar adjustments at home. Basic care still matters, but it works alongside professional attention when a job calls for it.
Keep the boundary simple: handle routine checks and careful cleaning if you’re comfortable, but don’t ride with a fault that could affect safe control. If your bike needs workshop attention, Explore Cycle Centre’s workshop services.
Build Confidence with Every Ride
Make routine care a small, steady habit rather than a task you put off until something goes wrong. With bicycle maintenance for beginners, confidence comes from knowing what you can handle and recognising when it’s wiser to leave a repair to a mechanic. That judgement helps you care for your bike while keeping your next ride in view.
When a fault feels beyond your experience, professional support is a sensible part of looking after your bike, not a sign you’ve failed at DIY. Cycle Centre brings 50 years in business to its workshop services, including Silver and Gold service packages and specialist e-bike repairs. Explore Cycle Centre’s workshop services and book the support your bike needs.
Frequently Asked Questions
Can I use a pressure washer to clean my bicycle?
No, avoid using a pressure washer on your bicycle. A strong jet can force water and grit into bearings, seals and other moving parts, where they may cause wear or interfere with smooth movement. Use a gentle flow of water only if needed, and keep it away from hubs, the headset, bottom bracket and suspension components. A soft brush and cloth are usually a safer choice for routine cleaning.
How do I fix a puncture on a bicycle?
You can repair a puncture by removing the wheel and tyre, taking out the inner tube and locating the leak, if you’re comfortable with those steps. Check the inside of the tyre for glass or another sharp object before fitting a patched or replacement tube, or the puncture may happen again. Refit the tyre carefully, inflate it to the sidewall guidance, then make sure the wheel is secure and the brake works before riding.
How can I tell if my bicycle chain needs replacing?
A chain that skips under pressure, has stiff or damaged links, or no longer shifts smoothly may need attention, but those symptoms can have other causes too. Chain wear is best assessed with a chain-wear tool, which checks whether the links have lengthened beyond the appropriate limit. If you don’t have one, or the chain is slipping despite cleaning and lubrication, have a mechanic assess it before continued riding causes further wear to the drivetrain.
Do new bicycles need maintenance?
Yes, a new bicycle still needs regular care as you ride it. Read the manufacturer’s guidance for the model, and keep an eye out for changes in how the gears, brakes and fittings feel during the first rides. If a bolt seems loose or a part shifts out of position, don’t guess at the correct adjustment. A mechanic can help with concerns that aren’t covered by simple cleaning and checks.
Can I maintain an electric bike myself?
Yes, you can carry out routine care on an electric bike, such as keeping it clean and checking its tyres, brakes and chain. Follow the manufacturer’s instructions for cleaning and battery care, and don’t open or attempt to repair the battery, motor or electrical connections yourself. If you see damage, notice unusual behaviour from the electrical system or aren’t sure what a fault means, stop and seek help from a suitably experienced workshop.
What should I do if my bicycle starts making a new noise?
Pause and try to identify when the noise occurs, for example while pedalling, braking or turning a wheel, without taking risks to reproduce it. Check for an obvious cause such as something loose or rubbing, but don’t dismantle parts to investigate. A persistent clunk, grinding sound or noise alongside a change in braking or handling deserves professional attention. If control feels affected, don’t ride the bike until it has been assessed.