


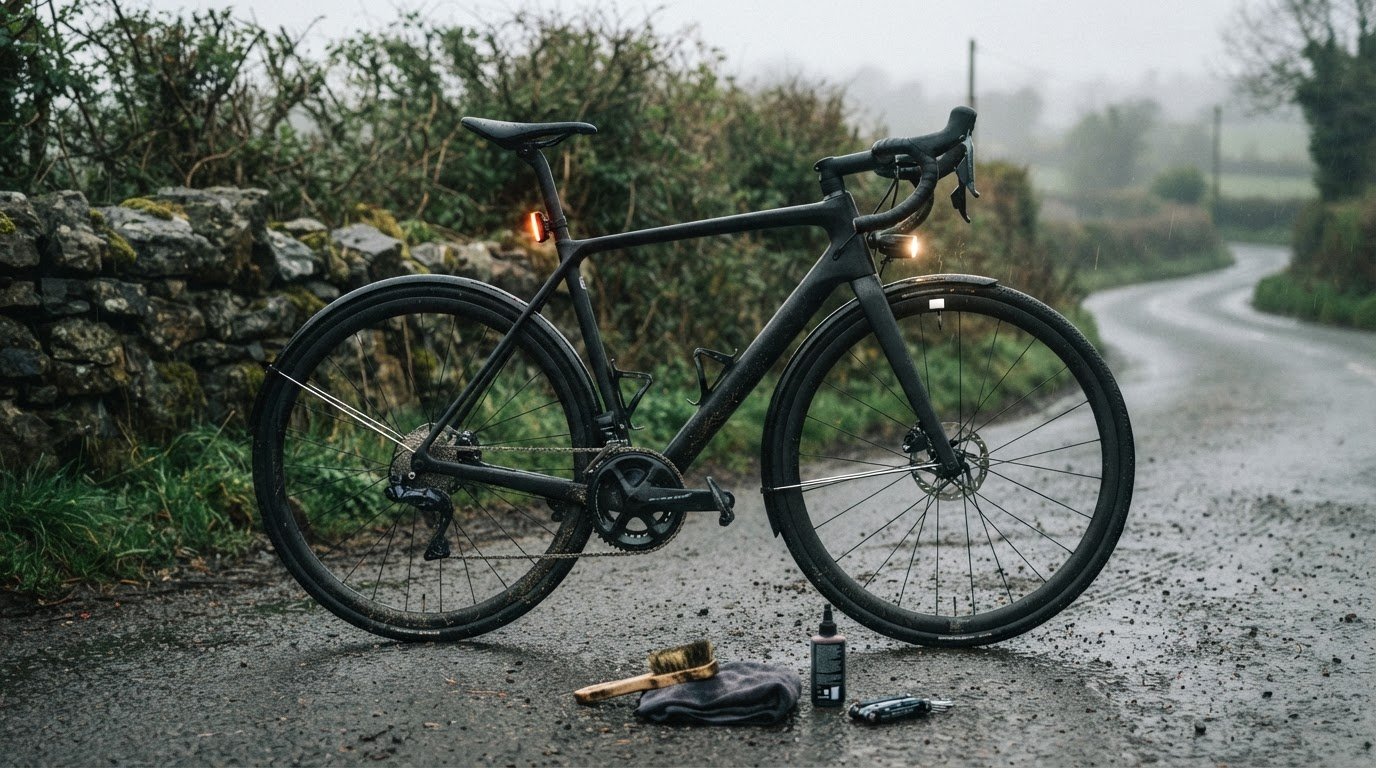
Road salt can do more lasting damage to a bike than a wet ride. A dependable winter road bike setup starts with mudguards to limit spray, then a prompt wash after salted rides and wet-weather lubricant on the chain. Choose hard-wearing tyres at least 28 mm wide for grip and puncture protection.
It’s understandable to focus on staying upright when Irish roads are wet, gritty and dark. But your bike needs protection too: salt and grime can build up on the drivetrain and other components if left in place. A few practical changes can make winter riding easier without turning every ride into a maintenance job.
This guide covers choosing winter tyres and lights, reducing salt spray, cleaning and lubricating the drivetrain, and deciding whether a dedicated winter bike suits your riding. You’ll also find simple care habits to help keep your bike ready for the next spin.
Key Takeaways
- Choose hard-wearing winter tyres at least 28 mm wide, with puncture protection and grip suited to wet roads; check pressure before each ride.
- Use a front and rear light, and choose a front light with at least 800 lumens for poorly lit streets or country lanes.
- Fit compatible mudguards to limit salt, grit and road spray reaching you and your bike.
- Wash your bike promptly after salted rides, then dry it and apply wet-weather chain lubricant without contaminating disc brakes.
- A dedicated winter bike can keep your main bike out of harsh conditions; consider disc brakes for more predictable braking across changing surfaces.
1. Winter tyres with puncture protection and wet-weather grip
For Irish winter roads, choose hard-wearing tyres at least 28 mm wide, with puncture protection and a tread suited to wet surfaces. Wider tyres can run at lower pressure than narrow racing tyres, helping them stay in contact with uneven tarmac. First, check your frame and fork clearance, then confirm the tyre fits your rims. A tyre that rubs mudguards or the frame can wear quickly and compromise a ride.
Check pressure before every winter ride, using a gauge for accuracy. Inflate towards the low end of the tyre’s stated pressure range to improve grip, while staying within its limits. The right pressure depends on the tyre, rider and bike weight, rim, and road surface. A 28c tyre is one winter option, but its safe pressure isn’t universal. Recheck after a sharp temperature change, as pressure can shift with the weather.
Are disc brakes or rim brakes better for winter road cycling? Disc brakes are often more predictable in changing conditions, including on wet roads. Rim brakes can still work, but dirty water and grit may affect braking and wear the rim’s braking surface.
How much does a reliable winter road bike setup cost in Ireland? There’s no useful single total: costs depend on what you already own and whether you’re changing tyres, wheels or the whole bike. Prioritise suitable tyres and puncture protection, then add compatible parts as needed.
Tubeless road tyres can reduce puncture risk and allow lower pressures for better road contact. You’ll still need a repair plan: carry a CO₂ inflator and tyre-plug kit for larger holes. With inner tubes, carry two or more on a long winter ride; if you can take only one, add puncture patches. Before setting off, check that your repair kit suits your tyre system.
Studded tyres use metal spikes to improve traction on ice, but add rolling resistance and wear faster on clear roads. Use them seasonally when icy conditions justify the trade-off. For freezing weather without persistent ice, choose winter tyres with a temperature-resistant rubber compound, check pressure before riding and stick to routes suited to the conditions.
What should I carry for roadside repairs on winter rides? Match your kit to your tyres: carry spare tubes and tyre levers for a tubed setup, or CO₂ and a plug kit for tubeless tyres. Add patches if you’re carrying only one spare tube. How do I prepare a road bike for icy or freezing conditions? Fit suitable winter tyres, use pressure at the lower end of their stated range, and check both before each ride. For ice, consider studded tyres, and don’t treat ordinary winter tyres as a substitute for ice traction.
2. Bike lights and visibility
Short winter days and Irish rain can reduce visibility on familiar roads. Fit a white front light and a red rear light, then position both so they’re visible and secure. For poorly lit streets or country lanes, choose a front light with at least 800 lumens. That gives you useful illumination to see the road ahead, not just a marker that helps others see you.
Aim the front beam down towards the road rather than into oncoming traffic. Check the beam’s position against a wall before cycling, then adjust it so it lights your path without dazzling others. A rear light with at least 100 lumens is a winter recommendation. Mount it where a jacket, saddle bag or mudguard won’t block its output.
One light at each end is a useful starting point, but a second source provides backup if a battery runs flat or a light fails. Consider two front lights and two rear lights, with the main front beam on the handlebars and a second light on your arm or helmet. Flashing modes can attract attention; choose a setting that stays visible in rain without distracting other road users.
- Charge rechargeable lights fully before each ride.
- Carry spare batteries for lights that use replaceable cells.
- Check the mount and switch before leaving home.
- Keep a backup set ready for longer rides or changeable weather.
Reflectors and reflective details on clothing can help drivers notice movement, especially at junctions. They don’t illuminate the road, so use them alongside lights rather than instead of them. Before setting off, check that lights remain visible from behind and from the sides. A high-vis layer can also make your outline easier to pick out against wet, dark roads. Explore cycling helmets and apparel for practical riding layers.
What bike lights are legal in Ireland after dark? When cycling after dark in Ireland, use a white front light and a red rear light, and make sure both work and are clearly visible. Add reflectors or reflective clothing for visibility, but don’t rely on them instead of lights.
Make light checks part of your winter routine: charge them, test both beams and check their mounts before every ride. On country lanes, use enough light to read the road surface and spot hazards early. In town, choose a beam that keeps you visible without shining into other people’s eyes. A dependable setup combines a suitable front beam, a visible rear light and a charged backup.
3. How can I protect my bike from road salt?
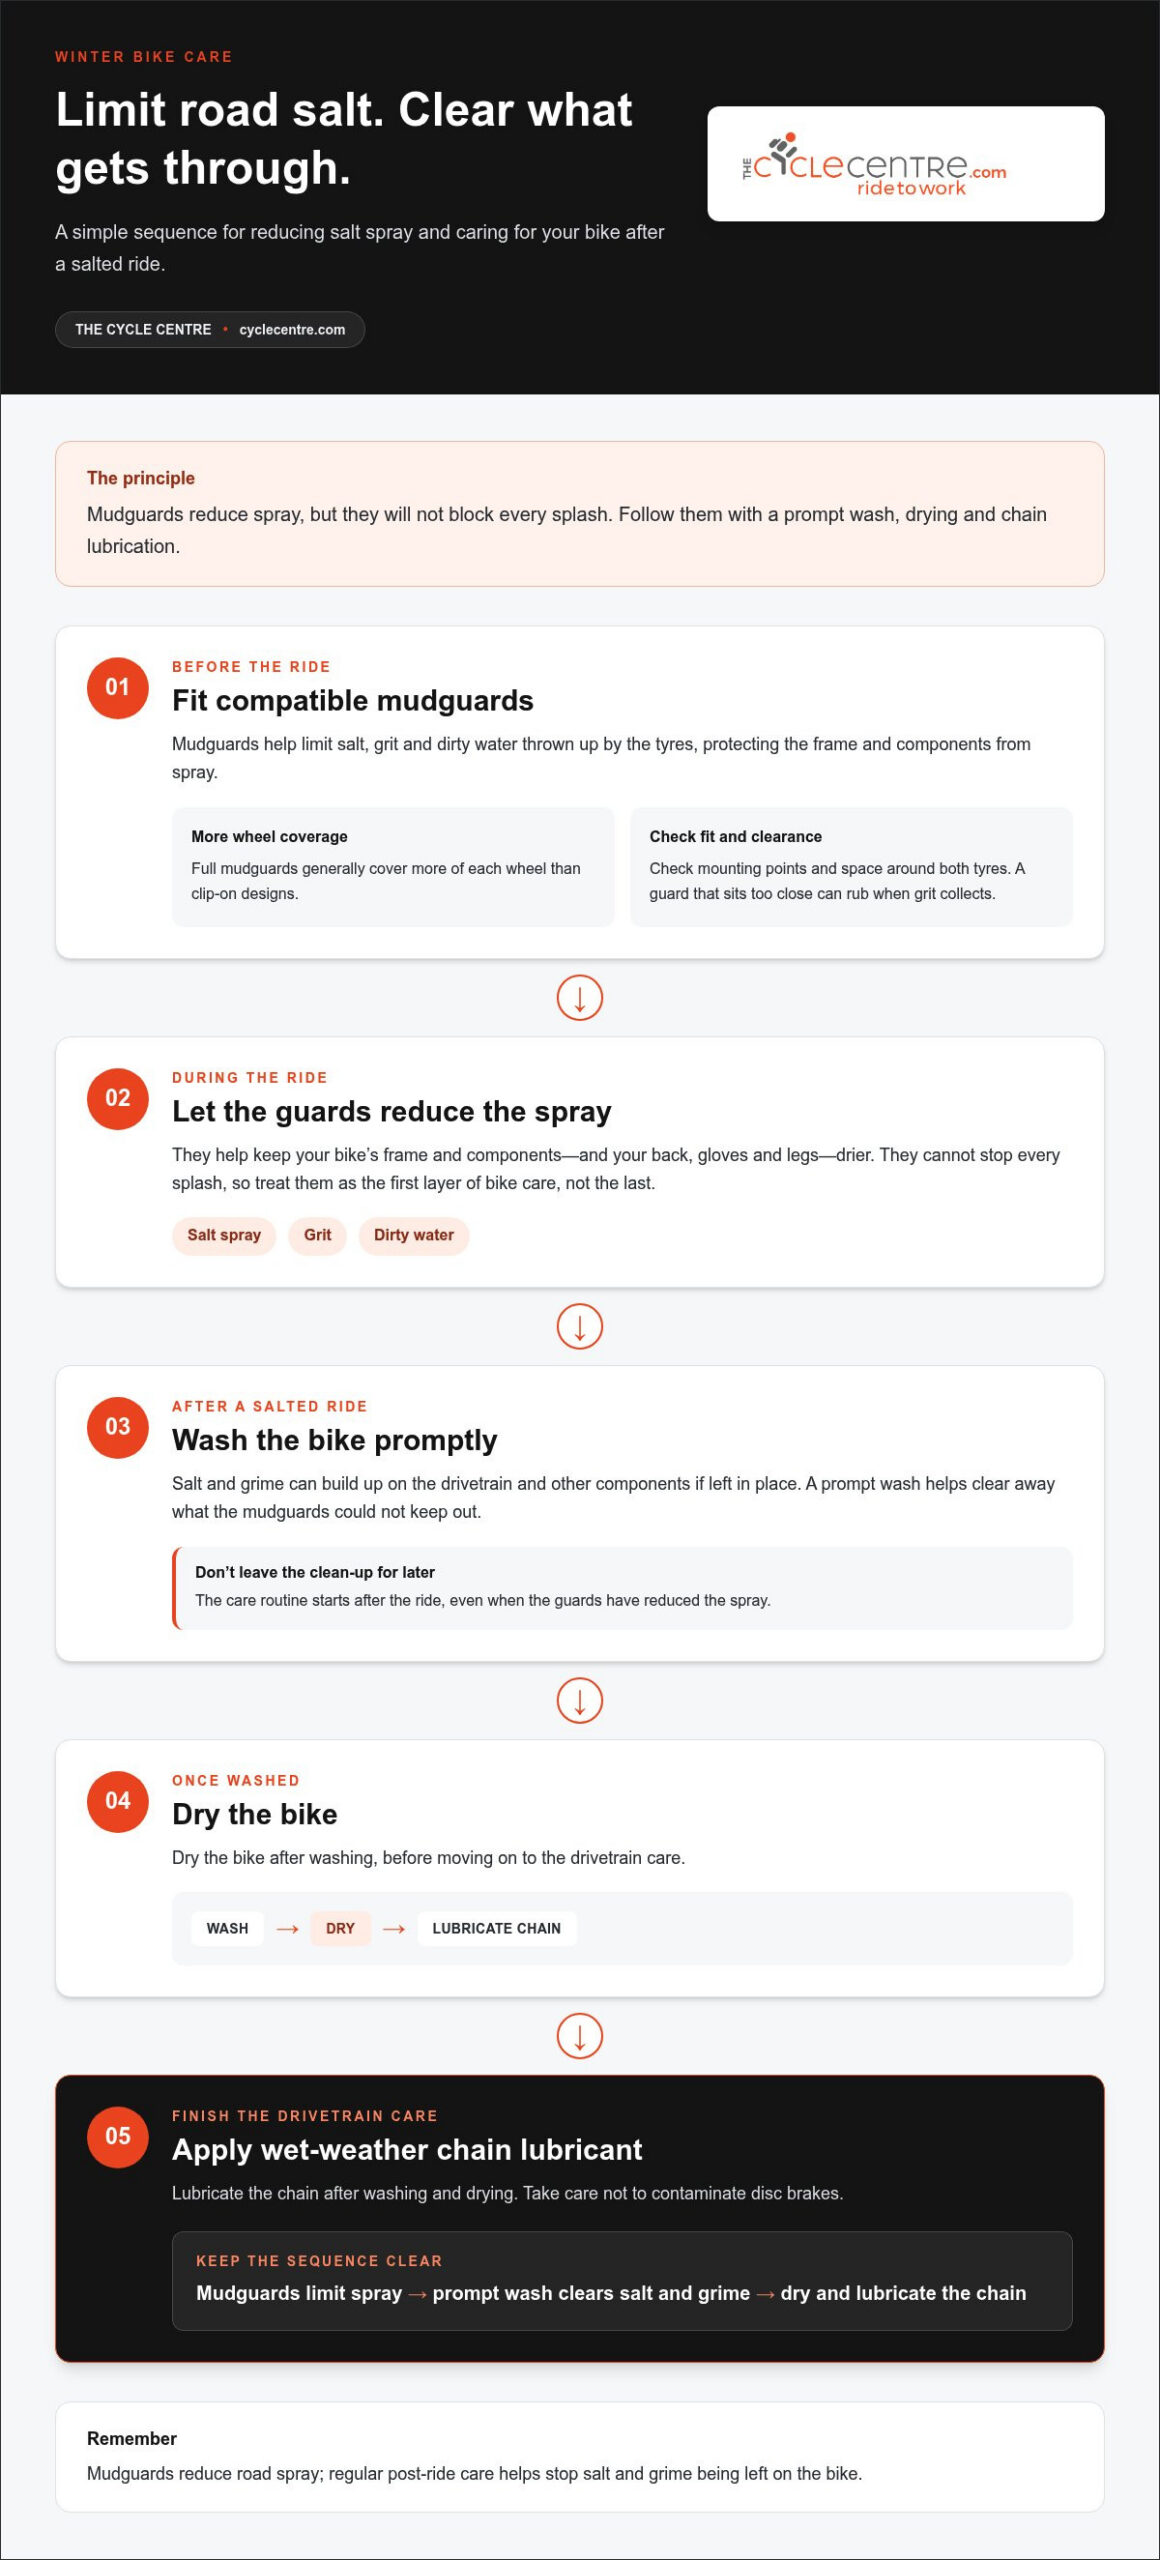
Fit mudguards before riding on Irish winter roads. They reduce the salt, grit and dirty water thrown up by your tyres, protecting the frame and components from spray. Full mudguards generally cover more of each wheel than clip-on designs. They also help keep your back, gloves and legs drier. They won’t block every splash, so treat them as one part of your bike-care routine.
Choose full mudguards if your frame and fork have suitable mounting points and enough clearance. Check the space around both tyres, including beneath the fork crown and rear stays. A guard that sits too close can rub when grit collects or interfere with a tyre. Match its width to your tyre, then spin each wheel to check for contact before riding.
Clip-on mudguards can suit road bikes with limited mounting options, but fit depends on the frame, fork and tyre clearance. Check the manufacturer’s fitting guidance against your exact bike rather than assuming a clip-on model will fit every road frame. Secure each attachment and inspect it after fitting. If a guard shifts towards the tyre or rattles over rough tarmac, stop and adjust it before continuing.
- Measure or inspect clearance at the fork, rear stays and brake area.
- Match the guard width to the tyre, not just the wheel diameter.
- Spin both wheels after fitting and listen for rubbing.
- Check the attachments again after a ride on rough roads.
For broader spray coverage, use front and rear full mudguards where your bike allows. A rear guard helps shield the seat tube and rear frame; a front guard reduces spray reaching the fork and lower frame. On wet country lanes, this can also limit muck thrown towards the rider behind you. Keep the guards clean, as trapped grit can scratch paint or rub against components.
How can I prevent punctures, rust and corrosion during winter cycling? Choose tyres with puncture protection, fit compatible mudguards to reduce salt and grit spray, and wash the bike promptly after riding on salted roads. Dry it before storing it indoors, and check exposed metal and moving parts for grime or signs of wear.
After a salty ride, rinse away residue instead of leaving it on the frame and fittings. Don’t direct a jet wash or hosepipe at wheel hubs, the bottom bracket or the head tube, where forceful water can reach bearings. Wipe accessible surfaces with a clean cloth, then dry the bike. If you can store it indoors, keep it sheltered from rain and freezing temperatures between rides.
4. Cleaning and lubricating the drivetrain after wet or salty rides
Salt and grit can cling to the chain, cassette and jockey wheels after wet Irish rides. Wash the bike promptly after riding on salted roads, rather than letting residue dry on the drivetrain. A gentle rinse and bicycle-safe cleaner loosen grime without blasting water into bearings. Avoid directing a jet wash or hosepipe at wheel hubs, the bottom bracket or head tube, where forceful water can reach protected components.
Clean the drivetrain methodically. Shift to a position that gives clear access to the chain, then use a brush and suitable degreaser to clean it. Wipe the cassette and jockey wheels, where oily dirt can gather, and rinse off the cleaner as directed. Dry the chain with a clean cloth before applying lubricant. Turn the pedals backwards to work lubricant into the links, then wipe away excess so it won’t attract fresh road grit.
Match chain lubricant to the weather. Wet-weather lubricant suits winter riding because it helps protect the chain in damp conditions, so don’t leave the chain dry after cleaning. Apply it to the chain, not near disc brakes. Lubricant on a rotor or brake pad can affect braking, so shield those surfaces and wipe away accidental splashes promptly.
- After a salty ride, wash the bike and drivetrain promptly.
- Dry the chain before applying wet-weather lubricant.
- Wipe excess lubricant from the chain’s outer surfaces.
- Keep cleaner and lubricant away from disc rotors and pads.
For a winter bike you use regularly, wipe it down at least once a week after grimy rides. Give it a more thorough clean and lubrication every few weeks during winter. Check the chain, cassette and jockey wheels each time; visible grime, stiff links or unusual noise can signal that they need attention. A clean drivetrain also makes it easier to spot wear before it affects shifting.
Winter bike gearing is a separate choice from cleaning, but it affects the routine you maintain. One rider used a 10-speed Ultegra groupset on a first winter bike and considered changing it to 1×11. That example shows the choice can be personal; the practical priority is keeping the chain and shifting components clean, lubricated and working smoothly.
After a wet ride, inspect the brakes as well as the chain. Wipe the brake surfaces and the areas that contact the wheels after snowy or dirty conditions, taking care not to spread chain lubricant. If the bike is regularly exposed to rain, store it indoors where possible, then check the drivetrain for dirt before your next spin. Dry clothing and gloves can make post-ride cleaning more comfortable, but don’t put off washing after a salted route.
5. Choosing a dedicated winter bike
A dedicated winter bike makes sense if salted commutes and wet training rides would otherwise expose your main bike to constant grime. It also lets you leave mudguards and winter tyres fitted instead of changing equipment between rides. But if you ride occasionally in winter and can clean your existing bike promptly, adapting it may be simpler. Decide based on how often you ride, where you store the bike and how much maintenance you’re prepared to do.
Start with the roads you actually ride. Irish winter routes can bring wet tarmac, grit and untreated icy patches, so prioritise reliable braking, tyre clearance and mudguard fit over a lightweight frame. Disc brakes are a practical choice for a winter bike because braking is more predictable across changing conditions. Check that the frame and fork accommodate your chosen tyres and guards, then make sure the wheels spin freely without rubbing.
A dedicated bike doesn’t need to be elaborate. One example from the research used a 10-speed Ultegra groupset, a familiar setup the rider had raced and trained on for four seasons. Familiar gears can make winter maintenance easier because you already know how the drivetrain should shift. Choose components you can clean and inspect regularly, rather than adding features that don’t solve a problem on your usual routes.
Think through the whole routine before deciding. A second bike needs storage, basic upkeep and its own lights, lock and repair kit. Stored indoors, it stays more sheltered from rain and freezing temperatures. Keep a jacket and other winter clothing ready with the bike, so you don’t have to move equipment from your main setup before heading out. For an e-bike, store the battery in a heated indoor room to reduce its exposure to cold.
- Choose a dedicated bike if frequent winter riding means repeated cleaning and equipment changes.
- Adapt your current bike if it has suitable tyre clearance and mudguard fittings.
- Prioritise predictable braking and a setup suited to your usual road surface.
- Plan where the bike, wheels and battery will be stored between rides.
Keep the takeaway simple: choose a winter bike to make regular riding and maintenance easier, not just to own another frame. If you’re weighing up a separate road bike for winter conditions, explore road performance bicycles and consider how each option fits your routes, storage and care routine.
The Cycle Centre: Bike to work
The Cycle Centre offers bikes for commuting and everyday journeys, including e-city bikes. Its Cycle to Work scheme may suit people considering a bike for regular travel. The right choice depends on your route, storage and how you plan to use the bike, as well as the winter care covered in this guide.
If you’re weighing up a bike for commuting or considering a change to your current setup, explore options that suit your riding needs. Contact The Cycle Centre or visit cyclecentre.com.
Make your next ride easier to commit to
A useful winter road bike setup fits your everyday routine, not just an ideal ride in perfect weather. Choose changes you can maintain consistently, and make preparation part of getting ready to ride. That practical approach can help winter cycling feel like a normal part of the week, rather than a task you keep putting off.
If commuting is part of your plan, The Cycle Centre offers Bike to Work, Cycle to Work and Ride to Work. These schemes can support your next step towards riding more often, whether you’re adapting your current habits or considering a bike for everyday travel.
Take the next step at your own pace. Contact The Cycle Centre to discuss your cycling plans, and keep making room for rides through the Irish winter.
Frequently Asked Questions
How can I protect my bike from road salt?
Remove salt soon after a ride, then dry the bike before storing it. Pay particular attention to hidden areas around the chainstay, under the bottom bracket and behind the mudguards, where wet grit can collect. Use a cloth to reach crevices, but avoid forcing water into bearings. Make washing and drying part of your winter road bike setup, then turn the pedals and wheels to check for roughness or rubbing.
What tyres are best for winter road cycling in Ireland?
A winter road bike setup for Irish roads starts with hard-wearing tyres that have puncture protection and a compound that stays flexible in cold conditions. Choose tread suited to wet tarmac for regular winter riding. Studded tyres are for icy routes: their metal spikes add traction but increase rolling resistance and wear on clear roads. Consider how often your usual routes freeze before choosing them.
What tyre width and pressure should I use on wet winter roads?
Start with tyres at least 28 mm wide, provided your frame, fork and rims can accommodate them. Set pressure within the tyre’s marked range, towards its lower end for wet-road grip, and use a gauge rather than judging by thumb pressure. The suitable point depends on the tyre and the total load on each wheel. Recheck after changing luggage or swapping wheels, as either can affect how the tyre behaves.
Do I need mudguards for a winter road bike, and which type fits?
Mudguards reduce spray on you and your bike. Full-length guards offer broader coverage when the frame has suitable fittings and tyre clearance. Clip-on guards can work without traditional mounts, but compatibility still depends on the frame, fork and wheel space. Check clearance with the tyre inflated and the wheel centred, then spin it to make sure the guard doesn’t touch.
What lights are required or recommended for cycling in Ireland in winter?
For winter visibility, use a white front light and a red rear light, and make sure both are charged and unobstructed. A front light of at least 800 lumens is recommended for poorly lit streets or country lanes; a lower-output light may suit well-lit routes where seeing the road is less demanding. Choose a beam that lets you see the surface without dazzling other road users.
How should I clean and lubricate a road bike in winter?
After a dirty ride, clean the chain and drivetrain, dry the chain, then apply wet-weather lubricant. Turn the pedals backwards to spread it through the links and wipe off the excess. Check the chain’s side plates and rollers for grime, and listen for rough shifting on your next ride. Keep lubricant away from disc rotors and pads, and don’t direct a jet wash at hubs or bearings.